A few weeks before the end of the holiday, I visited my friend in Germany whilst he was on his year abroad. During my visit I fell in love. His name: pretzel. Upon returning home, I found myself missing my new-found love. So, I tried to make some myself. I love baking every now and again (call me Mary Berry), but some of the techniques in this recipe were completely alien to me.
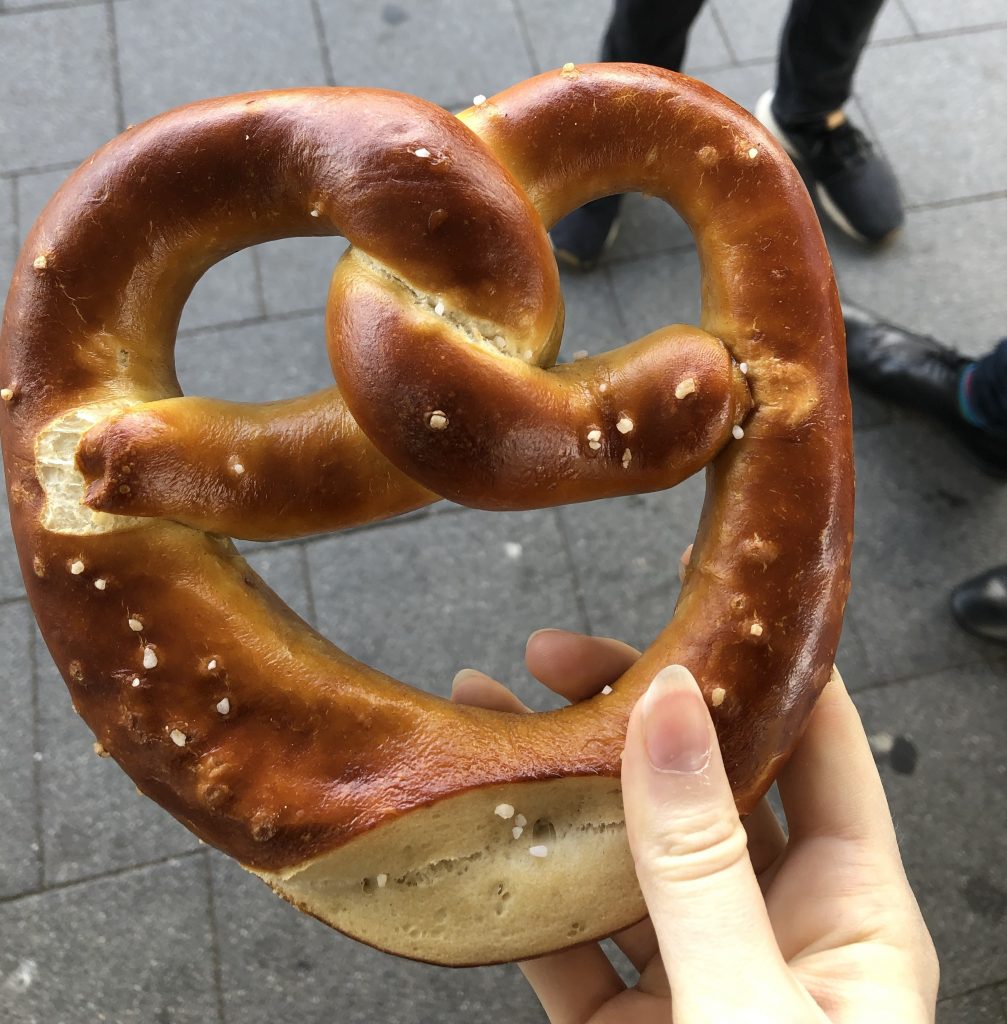
Image: Eleanor Warden
I started my bake by, well baking. Except I wasn’t baking a dough, I was tasked with baking bicarbonate of soda. To be honest, I have absolutely no idea what pre-cooking the baking powder actually did to better my bake, but I’m a stickler for rules so I followed my recipe to the letter.

Image: Eleanor Warden
The dough itself was really simple to make. Short of giving myself a bit of a workout when kneading the dough (arm day eat your heart out), I found these stages of the recipe really simple and similar to the stages required when baking an ordinary loaf of bread.
After proving, my next task was utilising my artistic skills to form the pretzels. I was actually really impressed by how the majority of my pretzels turned out. However, I found that the longer my dough was left out, the drier it became and the less precise the shape of my pretzels were.
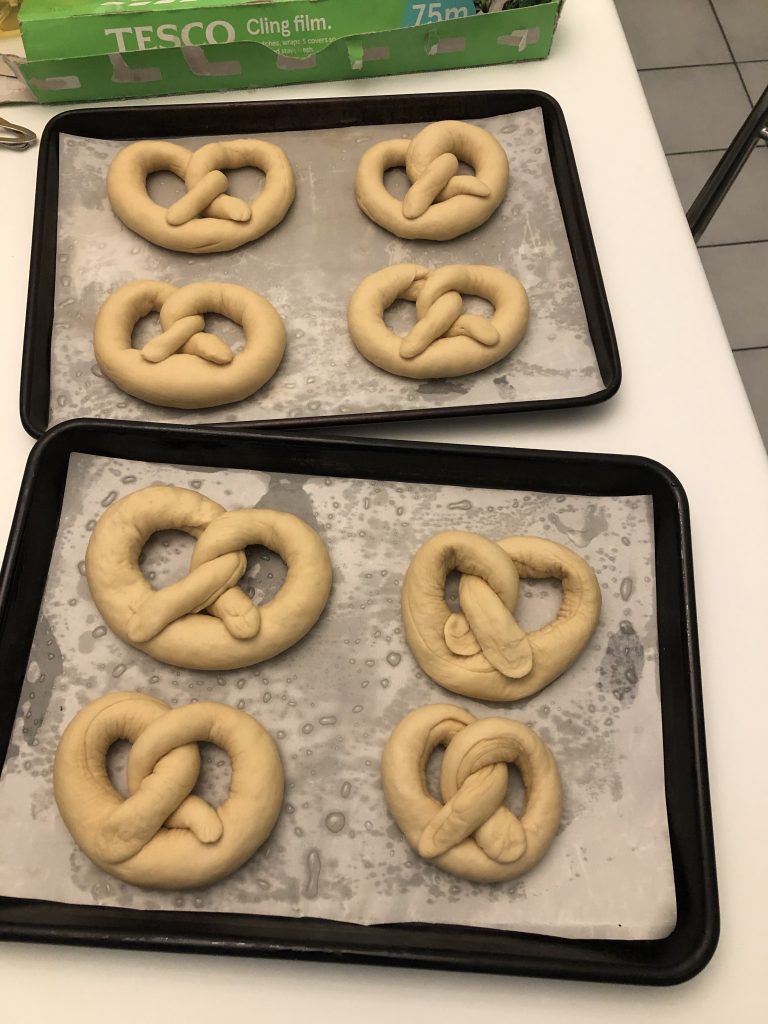
Image: Eleanor Warden
Another prove later (yes, these breads do take ages to make) and I was ready for the strangest part of this recipe: boiling. In order to create the characteristic, chewy crust of the pretzel, the dough has to be boiled on each side for 20 seconds. I was really worried about performing this part of the recipe; however, it was a lot easier than I had anticipated. After dumping my carefully prepared bicarbonate of soda into my water (seriously though, why did I have to bake it?), I placed my pretzels into the water with a slotted spoon and turned them after 20 seconds. Thankfully, the boiling process ensure that the shape of my pretzels gained more structure so that they didn’t fall apart when I was moving them.
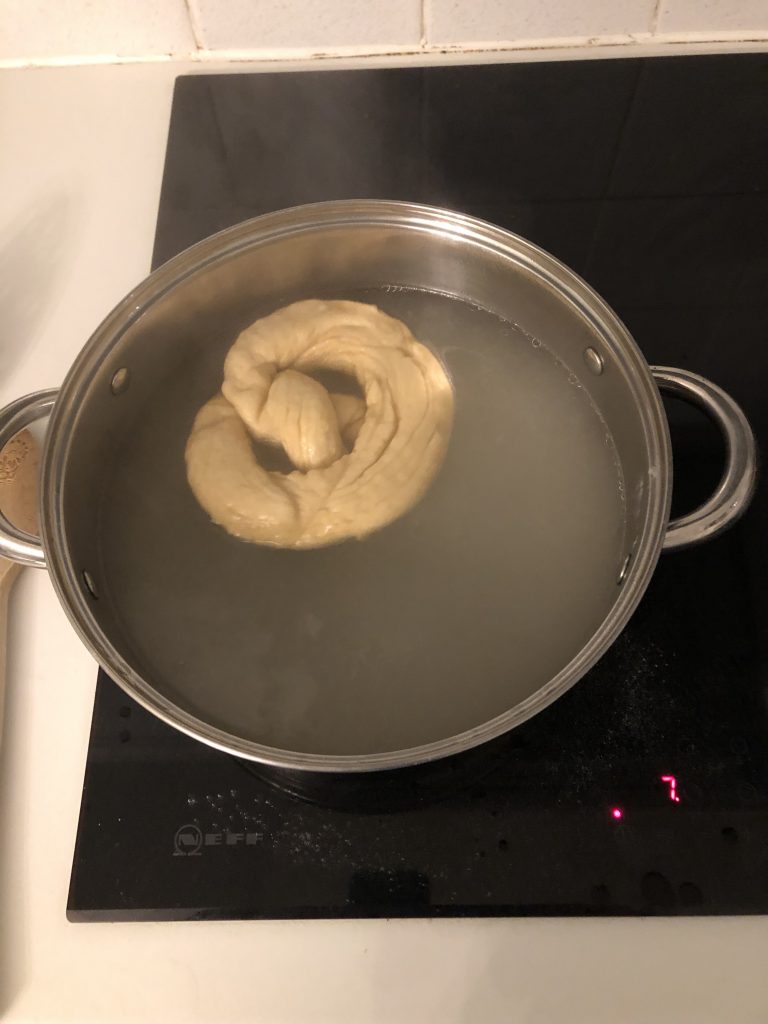
Image: Eleanor Warden
Finally, I put some egg wash and salt onto my pretzels and whacked them in the oven. A short while later and they were ready to eat. I personally found the baking the hardest part of the recipe as it’s really difficult to tell when they’re cooked due to the naturally dark colour of the pretzels.

Image: Eleanor Warden
Overall, I’m really happy with how my pretzels turned out. They may not have been as large as my german pretzel, but size isn’t everything. They had a lovely texture due to the uneven pattern of air bubbles inside the dough (yes, I have been watching bake-off this year) and they tasted delicious. However, I still preferred my original german pretzel, but I would happily eat these as a readily available alternative, I would just need a spare 2 hours to do so.
For the recipe I used, click here: